The workflow
Land Use (Flu)
Turn a classified land-cover raster into the land-use cost factor.
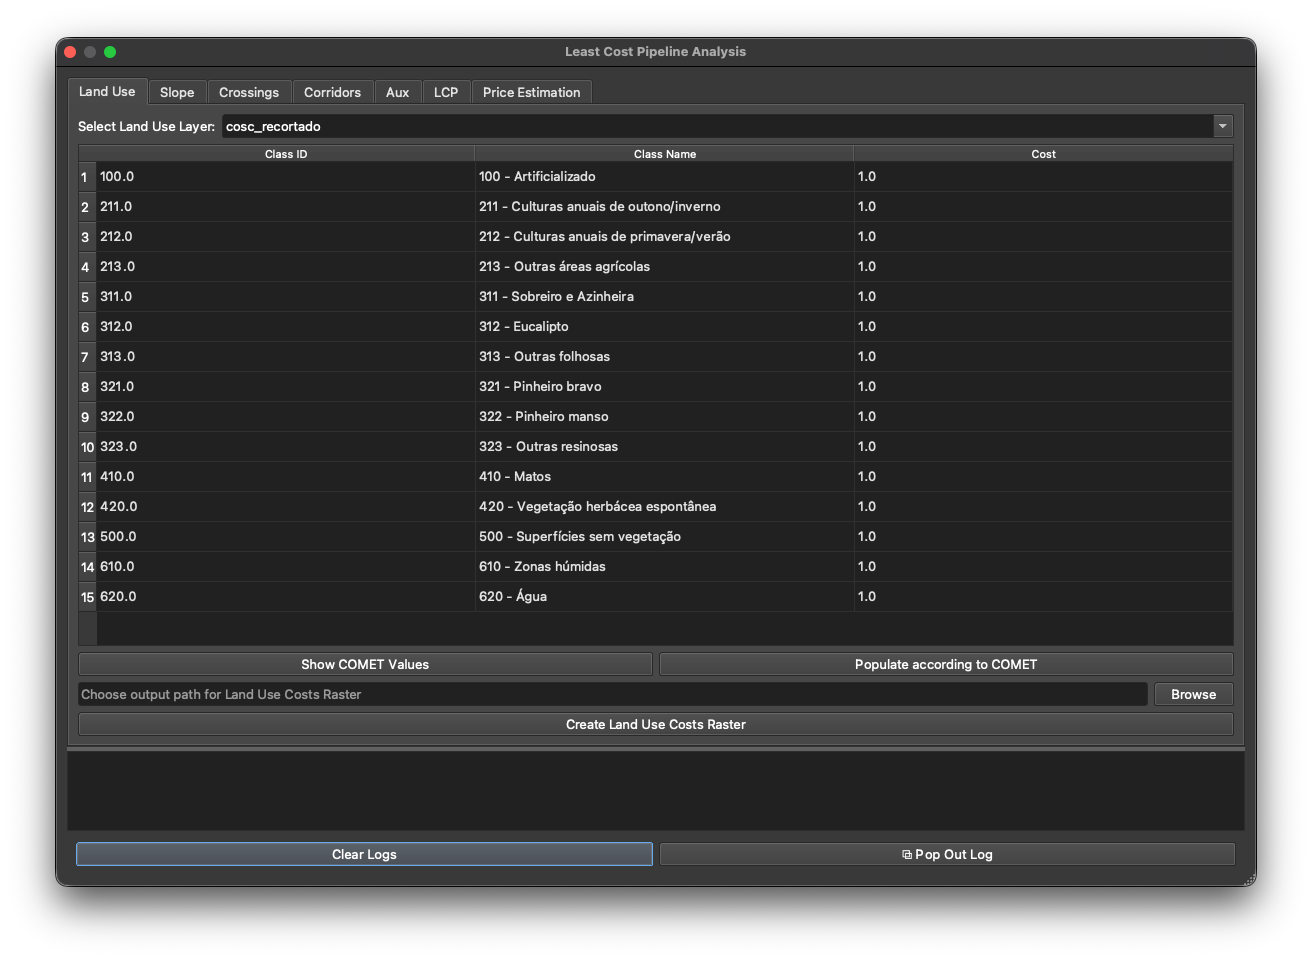
The Land Use tab produces the Flu cost raster — how acceptable each cell’s land cover is to cross. It’s the first factor of the COMET cost model.
Input
A classified land-cover raster, where each cell value is a land-cover class (e.g. the Portuguese COSc map). The plugin reads the class values and labels directly from the layer’s styling.
Steps
- Select Land Use Layer — pick the classified raster from the dropdown. The class table fills automatically with one row per class: Class ID, Class Name, Cost (default
1, editable). - Set the costs. Either type your own cost per class, or click Populate according to COMET to fill the COMET reference values. Show COMET Values opens a reference dialog mapping each COSc thematic class to its COMET land-use category and cost factor. Populate is tuned for Portugal’s COSc classes — with a different land-cover scheme, set the costs by hand. (COMET also defines a protected-areas category at cost 10, but COSc doesn’t flag protected areas, so it isn’t auto-filled — see Cost-factor tables.)
- Choose an output path (Browse) and click Create Land Use Costs Raster.
What it does
The tab reclassifies the input raster: every cell’s class value is replaced by its cost, producing a GeoTIFF that preserves the original CRS, resolution and extent. The reclassification is vectorised (fast even on large national rasters).
Cells whose class isn’t in the table are given a penalising value rather than a low one — so unclassified terrain never makes a route look artificially cheap.
COMET land-use values
| Category | Flu |
|---|---|
| Unpopulated | 1.0 |
| Cultivated / arid | 1.1 |
| Regularly flooded | 1.2 |
| Forest | 1.3 |
| Urban | 1.8 |
| Water bodies | 4.0 |
The full COSc → COMET class mapping is in Cost-factor tables.
Next: Slope.